`作为蒙层
```html
 ```
添加蒙层后结构
```html
```
添加蒙层的代码如下:
```js
function addImgCover(img, bgc = 'rgba(255,0,0,0.2)') {
// 如果有蒙层,则直接新的颜色
if (img.getAttribute('cover')) {
img.nextElementSibling.style.backgroundColor = bgc
return
}
// 标记已经添加过蒙层
img.setAttribute('cover', '1')
const divParent = document.createElement('div')
divParent.style.position = 'relative'
const divChild = document.createElement('div')
divChild.style.position = 'absolute'
divChild.style.top = '0'
divChild.style.width = '100%'
divChild.style.height = '100%'
divChild.style.backgroundColor = bgc
divParent.appendChild(img.cloneNode())
divParent.appendChild(divChild)
img.replaceWith(divParent)
}
```
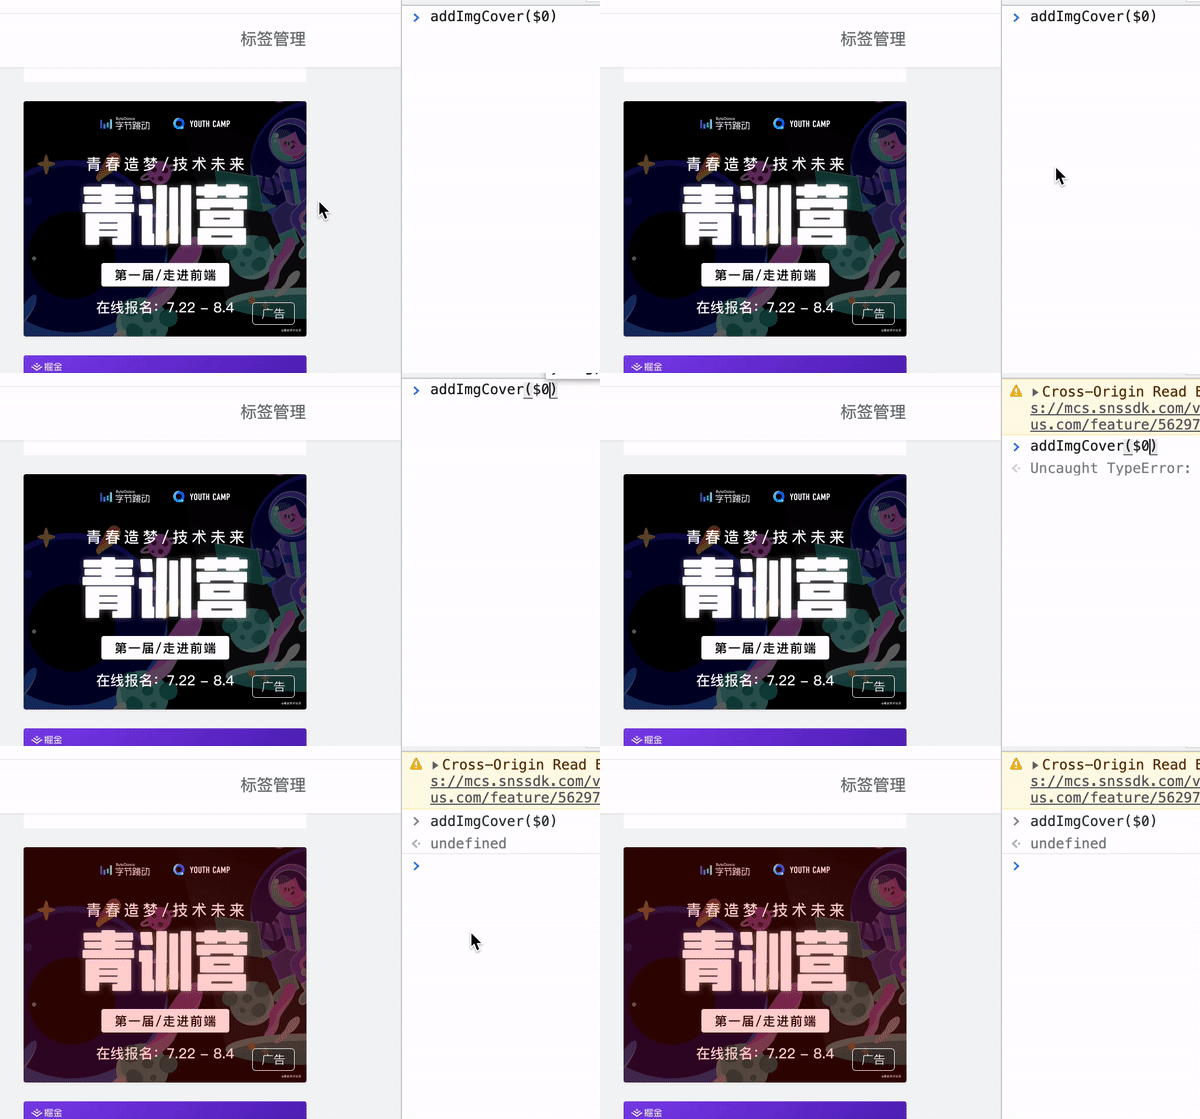
### 情况二
**思路:** 由于是背景图片,可直接为其添加一个子元素`
```
添加蒙层后结构
```html
```
添加蒙层的代码如下:
```js
function addImgCover(img, bgc = 'rgba(255,0,0,0.2)') {
// 如果有蒙层,则直接新的颜色
if (img.getAttribute('cover')) {
img.nextElementSibling.style.backgroundColor = bgc
return
}
// 标记已经添加过蒙层
img.setAttribute('cover', '1')
const divParent = document.createElement('div')
divParent.style.position = 'relative'
const divChild = document.createElement('div')
divChild.style.position = 'absolute'
divChild.style.top = '0'
divChild.style.width = '100%'
divChild.style.height = '100%'
divChild.style.backgroundColor = bgc
divParent.appendChild(img.cloneNode())
divParent.appendChild(divChild)
img.replaceWith(divParent)
}
```

### 情况二
**思路:** 由于是背景图片,可直接为其添加一个子元素`
`作为蒙层即可
```html
```
添加蒙层后结构
```html
```
添加蒙层的代码如下:
```js
function addBgImgCover(bgImg, bgc = 'rgba(255,0,0,0.2)') {
// 如果有蒙层,则直接新的颜色
if (bgImg.getAttribute('cover')) {
bgImg.children[0].style.backgroundColor = bgc
return
}
// 标记已经添加过蒙层
bgImg.setAttribute('cover', '1')
const divChild = document.createElement('div')
divChild.style.width = '100%'
divChild.style.height = '100%'
divChild.style.backgroundColor = bgc
bgImg.appendChild(divChild)
}
```
## 文字高亮
文字就比较简单,可以直接设置`background-color`实现
```js
function addTextCover(textEl, bgc = 'rgba(255,0,0,0.2)') {
textEl.style.backgroundColor = bgc
}
```
## 获取所有图片元素
使用`querySelectorAll`获取`img`元素
简单的递归方法获取使用`background-image`属性的元素
实现如下
```js
function judgeBgImgEl(el) {
return el && !!el.style.backgroundImage
}
function getAllImgEls() {
// 常规的
const imgs = document.querySelectorAll('img')
// 递归获取非常规的
const getBgIms = (el = document.body) => {
const res = []
if (el.childElementCount > 0) {
Array.from(el.children).forEach(v => {
res.push(...getBgIms(v))
})
}
if (judgeBgImgEl(el)) {
res.push(el)
}
return res
}
const bgImgs = getBgIms()
return {
imgs,
bgImgs
}
}
```
## 获取所有文本元素
思路跟递归获取图片一致,条件略有区别
1. 通过`textContent`可以获取元素的文本内容(包含子孙元素的)
2. 通过`childElementCount`可以获取子元素的个数
3. 当无子元素且内容不为空的元素即为目标元素
实现如下
```js
function getAllTextEls() {
// 递归获取
const getTextEls = (el = document.body) => {
const res = []
if (el.childElementCount === 0) {
el.textContent.trim().length !== 0 && res.push(el)
} else {
Array.from(el.children).forEach(e => {
res.push(...getTextEls(e))
})
}
return res
}
return getTextEls()
}
```
## 监听页面显/隐
这个就比较简单了,直接调用原生监听事件(`visibilitychange`)即可:
```js
let theme = 'red'
// 主题切换
window.addEventListener('visibilitychange', (e) => {
if (document.hidden) {
theme = theme === 'red' ? 'blue' : 'red'
changeTheme(theme)
}
})
```
## 最后
本文只是简单的抛砖,做了一个简单的demo
上述方式肯定还有考虑不周到的地方,留给感兴趣的同学继续探索
[完整源码地址](https://github.com/ATQQ/demos/blob/main/test-script/index.js)